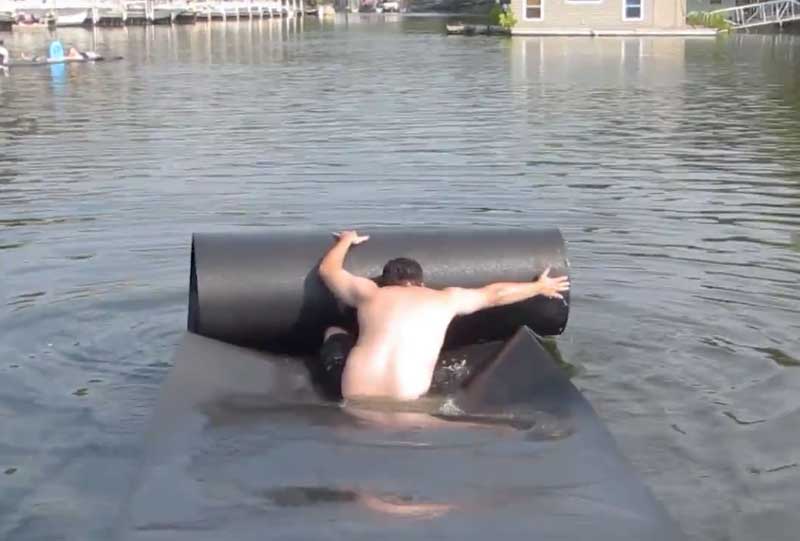
Over the last few years, floating foam mats and pads have become all the rage, and you’re bound to have seen them out on the lakes, typically hooked up to the side of a pontoon boat.
But here’s the thing; they can be very expensive, with it hard to find one for less than $200. In fact, if you’re going to buy a decent one with enough room you shouldn’t really be spending anything less than $400.
Before I get into this quick guide on how to make a floating water mat for your boat, I want to add a disclaimer: I have not done this myself but based on owning two floating foam pads I know exactly how they are constructed and the elements you will need to create one that works as it should.
I also recommend that instead of making one and potentially placing your kids and friends at risk, you should buy a legitimate one that has passed all the safety tests and is designed to be used as a floating water mat.
All I am doing here is showing you how I would make a floating foam mat, if I wanted to and had to.
I own a branded one, and it’s served me and my family really well. Click the link in the section below to see which ones I recommend.
Buy a Floating Mat:Click here to see the top 5 floating water mats that are currently available to buy online and have been tested for safety.
If you really do want to continue, here’s how I would do it.
Step 1: Create the Foam Matting Area
I believe the best foam to use would be something like cross-linked polyethylene (PEx) foam. It’s said to be mechanically durable and is resistant to chemicals including those found in swimming pools, plus will be UV resistant for sunshine.
You can buy stuff like this from industrial foam suppliers, and I would look to get something that is at least 1.5 inches thick.
You will then need to decide how large your will be.
Typical floating mat sizes tend to always be 6 feet in width, with lengths varying from 9 to 20 foot in length.
Step 2: Create Holes for Tethering & Anchoring
If you are going to be using your DIY foam water mat on a lake, then you simply must have a connection point to attach a tether, such a bungee cord.
Most of the commercially available floating mats will also have small grommets in them so they can be anchored to the lake floor.
If you aren’t using yours on a lake but are going to be just using yours in a swimming pool then you can miss this step.
Step 3: Load Test the Floating Pad
Once complete, stress and load test your DIY floating mat in a swimming pool. Don’t even think about taking it onto a lake until you have done so.
In terms of how to load test it, get your friends involved.
The load levels I would recommend would be:
- 9 x 6-foot mat: 4 adults
- 15 x 6-foot mat: 5 adults
- 16 x 6-foot mat: 6 adults
- 18 x 6-foot mat: 8 adults
- 20 x 6-foot mat: 9 adults
Those dimensions are based on the classic sizes you can buy online, and the types of weight limits and capacity the branded mats are able to carry safely.
The Last Word on DIY
Please do not use a DIY floating mat on any open water, lake, ocean, or similar. It is simply far too dangerous and you should always purchase a legitimate floating mat from a branded supplier. Here are some that I recommend.

