It was only a couple of weeks ago that Christmas passed, and if like us you have young kids, what is it about all those cardboard boxes that they seem to prefer better to the toys?
My 5-year-old son is just the same, and this year wanted to know how to build a boat out of cardboard boxes. I had never done this before so I spent some time researching online to see what the best methods were, because we actually wanted to see if we could make a boat that would float and not sink.
Below you can see a number of different methods, including how to build a cardboard boat that won’t sink towards the end… well, that was the plan anyway!
Go take a look and try some of these methods out for yourself.
How to build a boat out of cardboard – 2 methods (non-floating)
The first type of cardboard boat I found out how to build were simple ones designed for my kids to play in.
Doing this with your kids makes for a really fun creative play idea which will get them thinking about design and engineering. The smaller ones I list first are brilliant for parties, outdoor movie nights, garden play, or just to help you pass the time during school vacations.
Important note: The following 3 ideas are not designed to float and will sink, they are simply ideas you can build to be used indoors or the garden for your children to play in.
Idea 1: How to build a very simple cardboard boat for one
To get started, I recommend starting small, and this method is ideal to get you used to how to do it. But this one won’t float, it will sink, but is perfect for your kids to play in using left over cardboard boxes you have around the house.
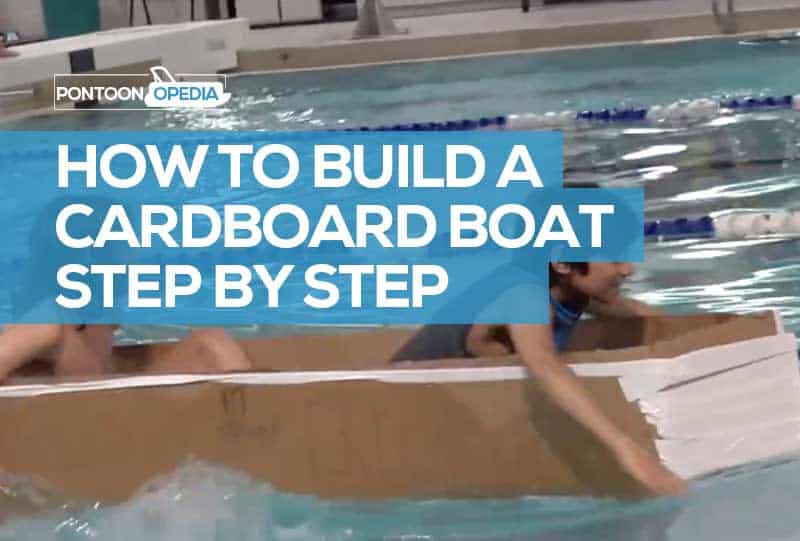
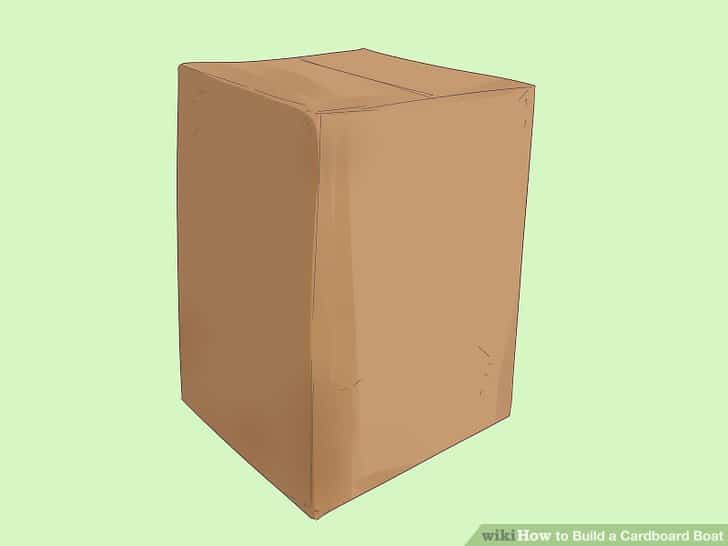
Step 1: Find a cardboard box large enough for your kid to sit in
Imagination is key here, and it’s by far the easiest way you can build a play boat out of cardboard boxes. Just find a good sized box that is sturdy enough for your kid to sit in.
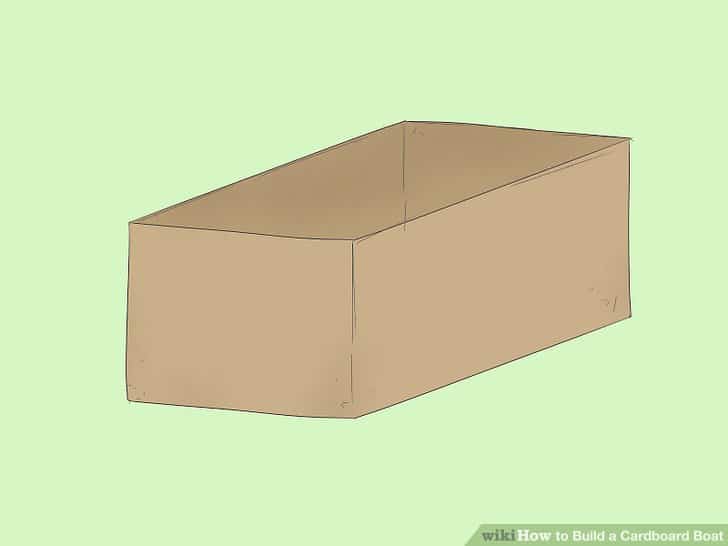
Step #2: Cut semi-circle shapes from the port and starboard sides
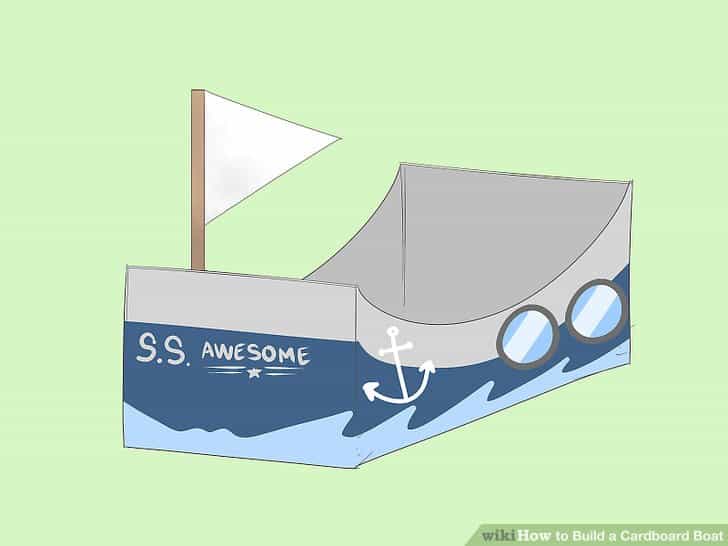
Just in case you don’t know, port is left, and starboard is right! All you do is cut out large semi-circular shapes from the side of the cardboard box, as shown in the image below. It will let your kid get in and out easier, and looks really cool!
Step #3: Decorate and cover the cardboard box boat
The next stage involves getting really creative. You can whack some paint onto your boat, cover it with patterned or colored paper to help make it look more maritime!
To make your boat look like it’s riding the waves, try adding a wave pattern near the bottom. This is a great little touch that will really set your vessel apart from the rest.
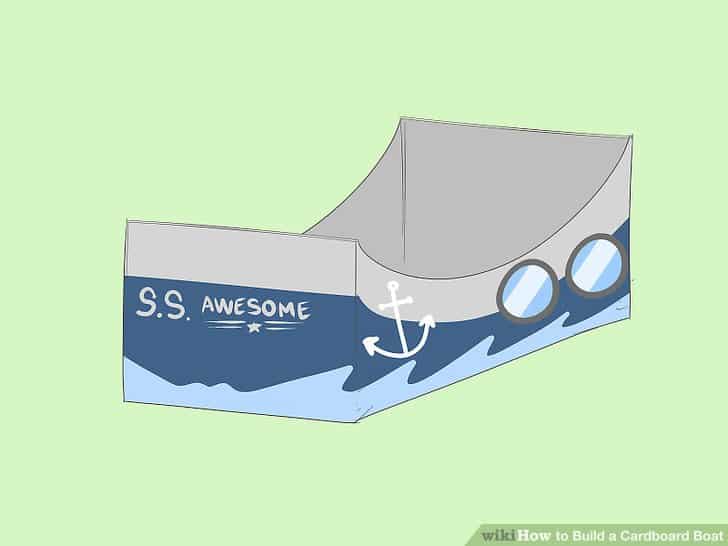
And for a real nautical effect, have a go at adding other elements you might find on a boat such as portholes, an anchor, and then give your boat a name.
If you are stuck on ideas on what to call your boat, click here for some naming inspiration.
Step #4: Add a boat’s sail and flag
To take things one step by step further, how about adding a sail and / or flag? It’s simple to do; just use a long cardboard roll, glue it in place, then glue a paper sail on. The same process will work with a flag, perhaps at the rear of your boat.
Step #5: Launch your cardboard boat onto the high seas
OK, so perhaps not in the sea, as this one is not designed to float and will definitely sink in just a few seconds.
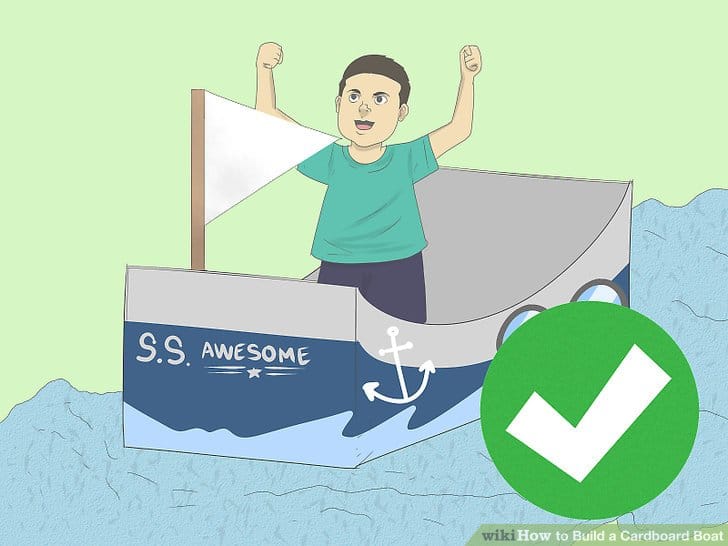
But with a little imagination and play, you can launch your child out onto the carpet or out on the garden lawn to re-enact their own pirate battles.
Just don’t try smashing a champagne bottle on it as part of the launching ceremony!
Idea 2: How to build a cardboard boat step by step for a crew of kids
Next up, how about a boat that more than one kid can play in. That’s what you’re going to see now with a step by step guide on what you need to do to accommodate a larger crew. And just like before, this one won’t float and is just designed for play. For floating non-sink vessels, keep scrolling down!
Step #1: Get a very large cardboard box
You need something big here. And by that I mean one of those cardboard boxes that you might get when you buy some furniture. Or if you have recently moved house, one of those removal boxes is just perfect.
If you can’t find one anywhere, visit a local furniture store as they might have one you can have for free, or you can buy removal boxes on Amazon.
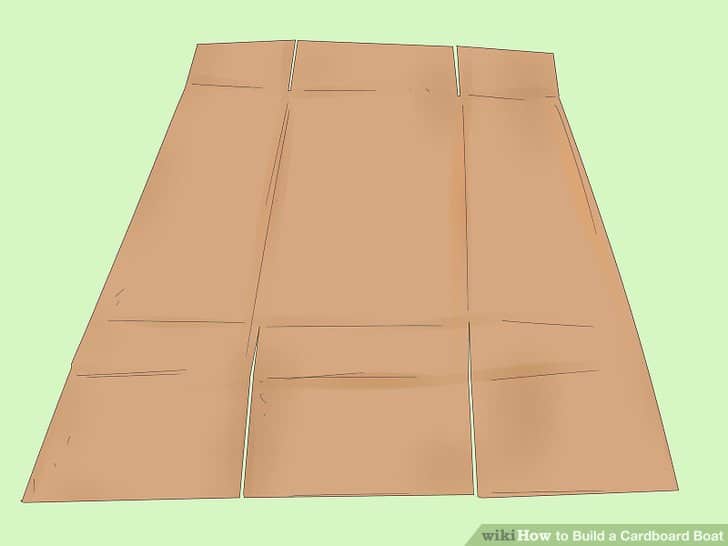
Step #2: Open the box out and flatten it on the floor
Cut any tape on the box and then carefully separate all the sides, laying it out flat onto the floor or the table you are working on.
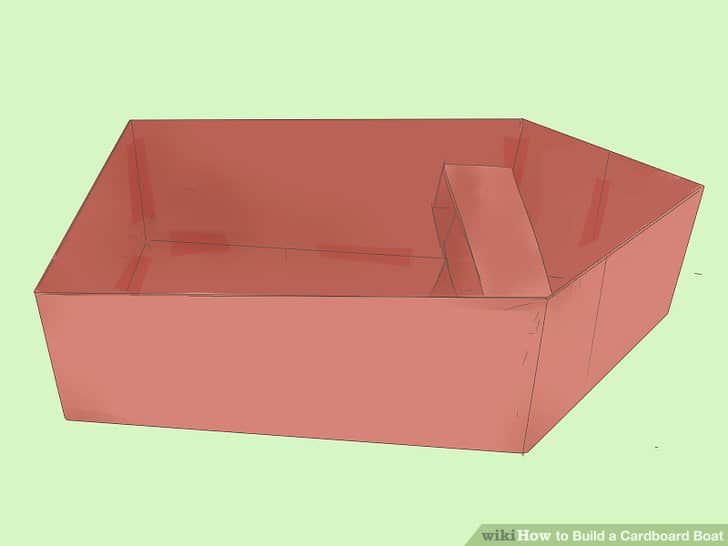
Step #3: Build the sides back-end of the cardboard boat
Look at the illustration below, as next you will need to build up the sides and rear section of your homemade DIY boat. Pull those aspects into position, and then use some tape to secure them all in place.
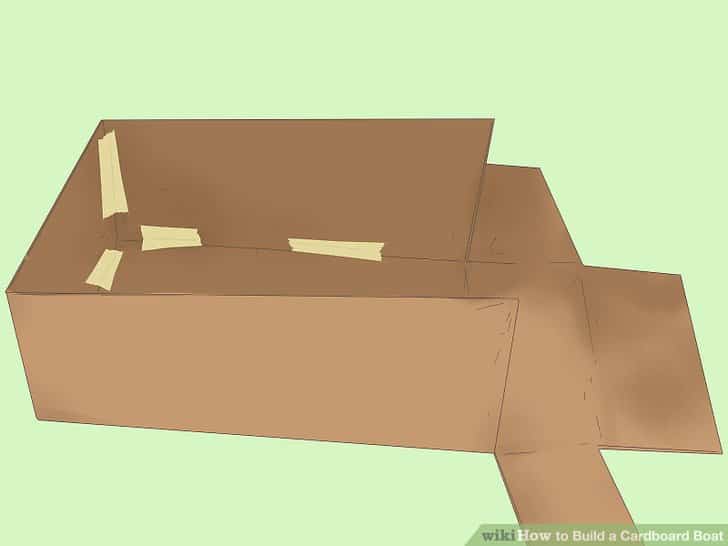
It’s very easy to do, but you might need someone to help you hold the sides in place as you secure them in place using the tape.
Step #4: Build the front end of the boat
This part is quite fiddly as you need to make the front end that will power through the imaginary waves. The best way to do this is to shape the front flaps of the box into a triangular shape, taping it into place securely.
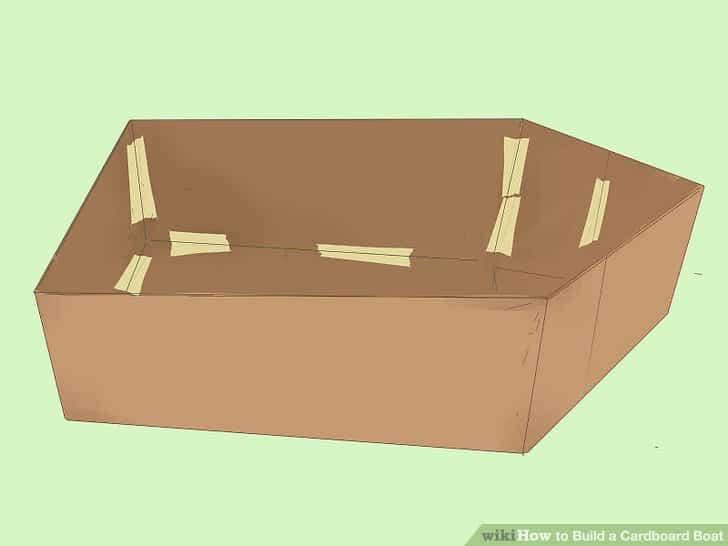
You will need to cut some of the cardboard, but it should bend into place with a little help as doing it on your own can be tricky.
Step #5: Build the sail post
You can skip this part if you like but having a sail in the cardboard boat lets you go the extra mile in your project – you are creating a sail post in the base of the cardboard box boat.
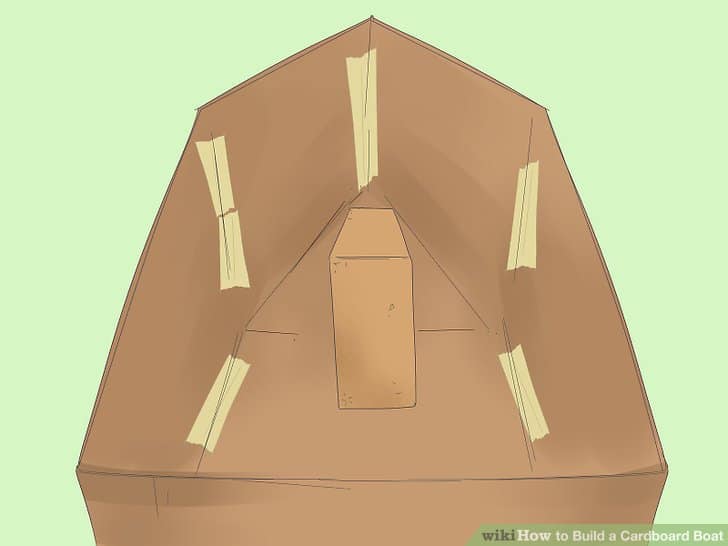
Do this by using a smaller cardboard box, glue it into the bottom at the part where the front of the boat starts to angle into a triangle.
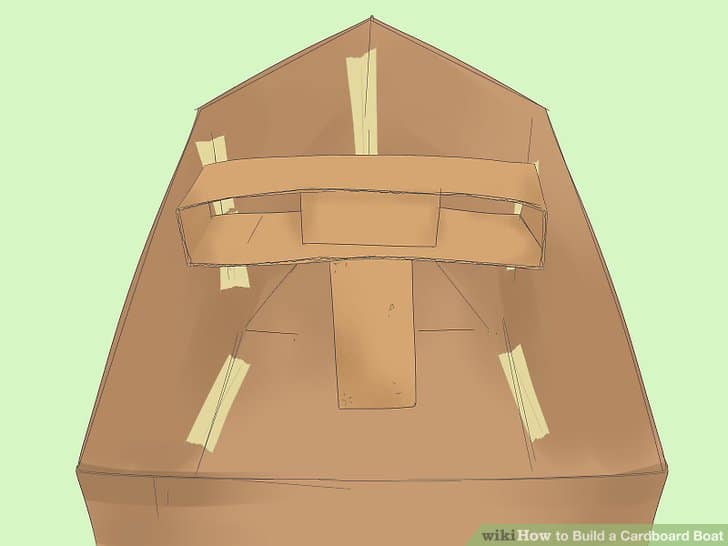
Step #6: Build the sail post up into a t-shape
Your sail is going to sit on a t-shaped bracket, and you can build that by taking some off-cuts of corrugated cardboard to build a platform over the previous step. Look at the illustration below to see what I mean.
Step #7: Get painting in a base color
You can now paint the insides and outside of the boat. Don’t worry about any decorative elements just yet, all we are doing here is painting on the primary color you want your cardboard boat to be.
Step #8: Add your sail onto the t-shaped sail post and paint it
You will now add the sail. A great way to do this is to use a broomstick handle, as you place that through the sail post, securing with tape.
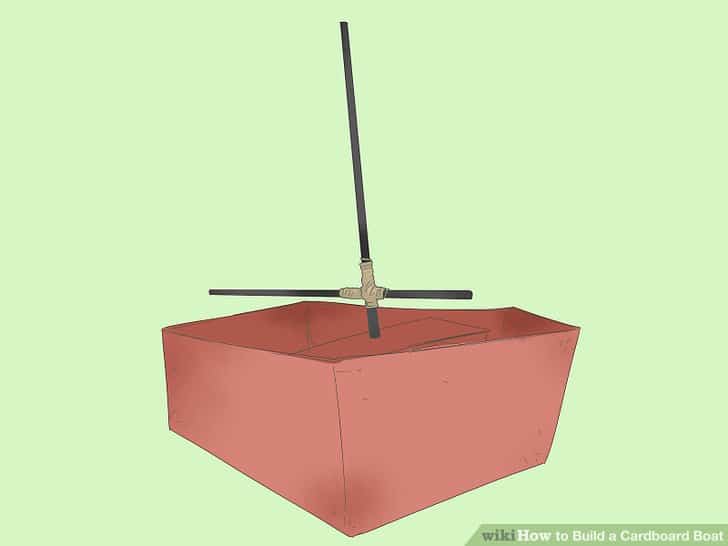
Once the main post is set through the bracket, you can then add a cross section to it using a smaller piece of broomstick wood. To keep that section securely attached, wind string and duct tape around it until it stays in place.
When you are happy that the sail post is sturdy, you can paint it with a darker color.
Step #9: Attach your sail onto the sail post
The final element of the sail is the actual sail fabric itself. You can use a tablecloth or an off cut from an old sheet for this. Simply cut two different sized triangles, and then tie them in place using string.

Step #10: Secure the sail to the sides of the boat
To make sure that the sails stay in place, use string from the top of the sail pole that reaches to the side of the boat, where you can then tie into holes.
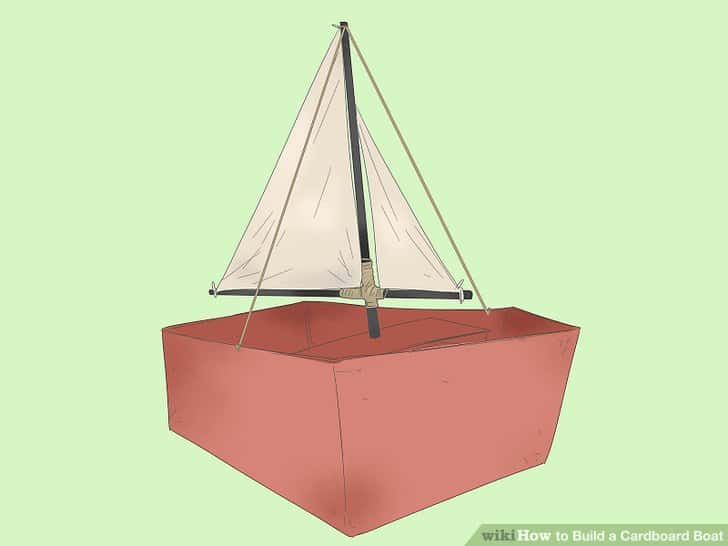
Step #11: Decorate the boat
You can now get creative again with decorative elements such as the boat’s name, some waves on the side of the boat, and whatever else you think will make it look more realistic.
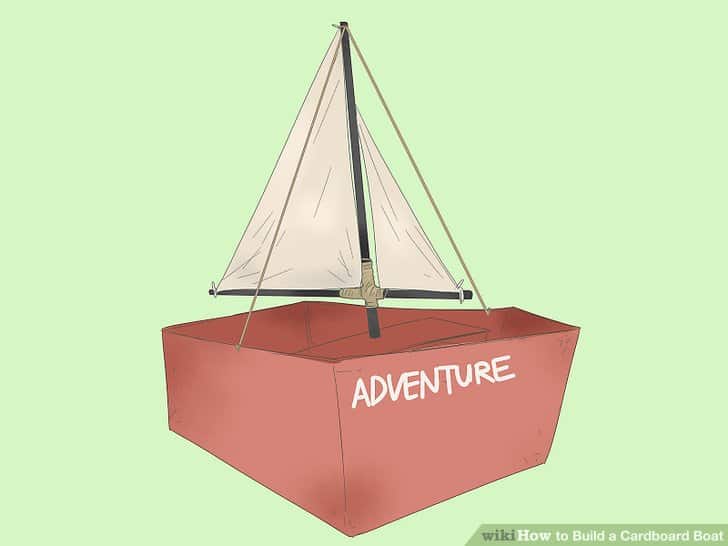
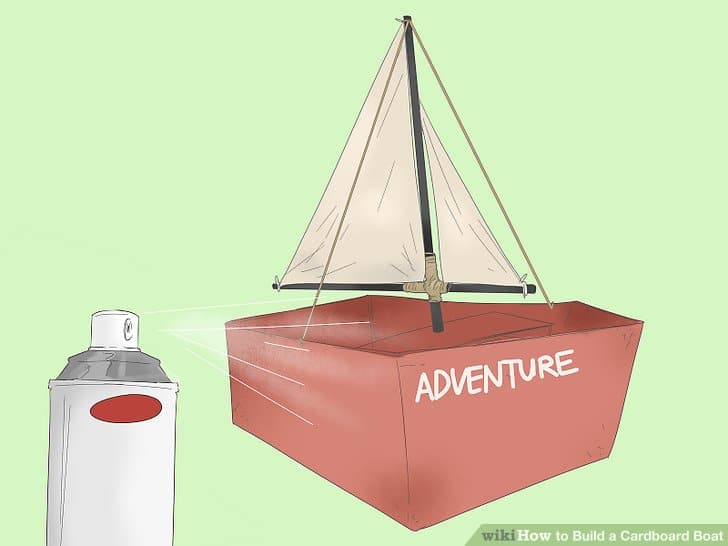
Step #12: Use sealant to add a layer of protection
If you want your new pride and joy to survive the type of punishment a group of kids will mete out to it, then I advise you spray over the dry paint with a sealant. This will help keep the paint in place when the boat starts getting knocked about and dragged during play.
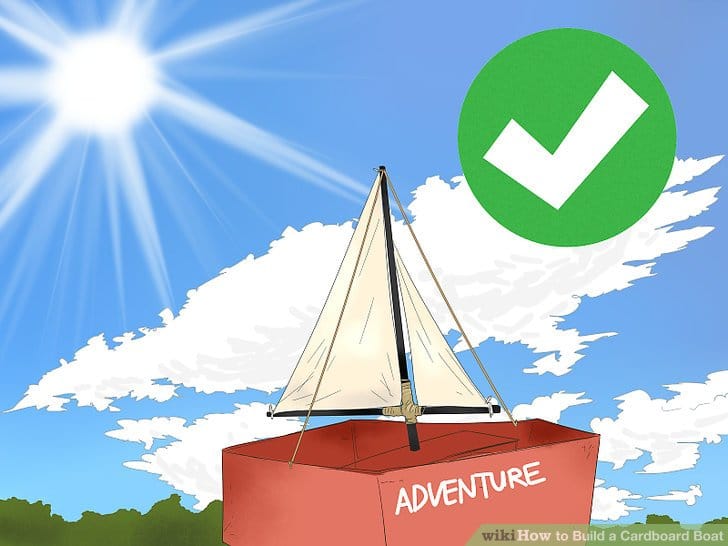
Step #13: Let the kids play at being pirates!
And that’s it! You have now built a large cardboard boat for your kids to play in.
How to build a cardboard boat that floats and won’t sink
But what about something a little more complex that you can race and have fun with in the water?
I won’t lie, this is actually really difficult to do as you can see from some of these cardboard boat races that I found on YouTube.
Video 1: The ultimate cardboard boat race
Video 2: The Great Cedar Lake cardboard boat race of 2015
How to build a cardboard boat that won’t sink for racing
So that’s how the professionals do it, and the results they get, but how do the build a cardboard boat that won’t sink, designed for racing?
I found a very good tutorial on the Instructables website. If you Google “instructables cardboard boat step by step” or you can click here and you will find it.
They manage to do it far better than I could ever do it, so head on over their today for step by step instructions on what you need to do, and what equipment you will need to buy or get your hands on.