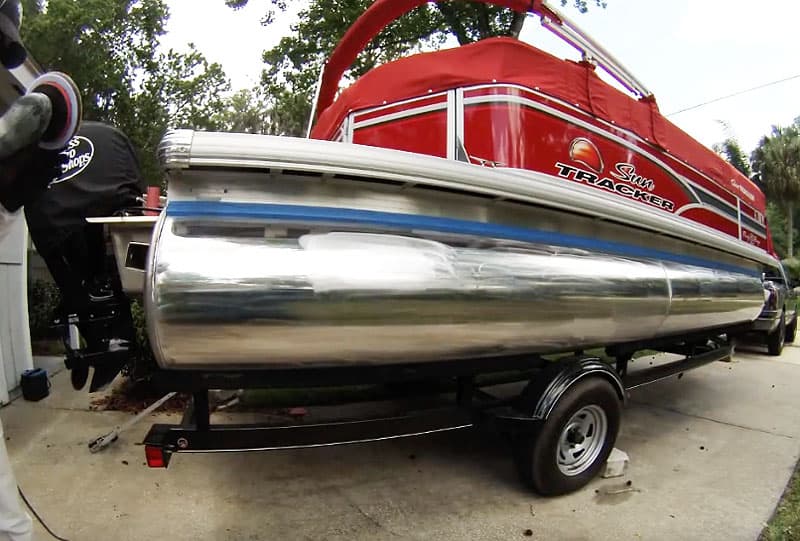
Remember how shiny your pontoon tubes and logs looked when you first bought your boat? If that sounds like a very distant memory, then perhaps it’s time you got them looking nice and new with an effective and efficient pontoon polish.
What I am going to today is show you how to polish a pontoon boat so that you get stunning results, with clean, slick, and shiny aluminum logs in under 3 hours – plus you can save a lot of money in doing so.
These tips will help you to ensure that not only might you get improved performance, but it’s also going help you to keep the value of your boat from depreciating – after all, who wants to buy a used pontoon with algae and dirt all over the tubes?
If you have ever taken your boat to a dealer and asked them to clean up your logs and tubes, chances are they quoted you back a cost of nearly $500 for creating a mirror-like result, and then finish it off with Shark Hide.
Quite frankly, that price is absurd when you can do it easily and polish them up yourself using cheap and easily accessible materials.
All you will need to do is buy some reasonably cheap polishing products (and I will show you what the best ones are in this guide), then spend a little time, and exert some effort, and you will have the shiniest and best-looking pontoon logs out on the water for your next trip.
How to Polish a Pontoon Boat: 5 Steps
Step 1: Prepare Your Pontoon Tubes
Fail to prepare, prepare to fail.
You are never going to get a great polished finish on your logs unless you prep them first. That means getting rid of all that nasty algae, barnacles, osmosis, zebra mussels, scum, debris, and more from the tubes – this can be a particularly problem in saltwater areas.
If you have regularly cleaned your pontoons after each trip, then hopefully you won’t have any of this grim build-up to remove. But if you do, it all needs to come off before you start the pontoon boat polish – you can find out how to remove algae here – do that first.

![]() Assuming you keep your pontoons in good condition and there’s no build-up of scum or algae on them, you can skip straight to a quick wash-down.
Assuming you keep your pontoons in good condition and there’s no build-up of scum or algae on them, you can skip straight to a quick wash-down.
This is as simple as using a pressure washer in straight up and down motions, until the tubes are clean of debris. If you don’t have a pressure washer, I would advise you buy a small portable one (the Sun Joe on Amazon is good).
If you don’t want to spend that money, then use a wet rag. It will take you much longer though and will be very hard work.
Step 2: Apply Cleaner
This step won’t polish your pontoons, but it is still essential as it will make the results last a lot longer, believe me. If you don’t do this before applying pontoon polish, all of your hard work is going to probably come straight back off after one trip on the water.
As weird as it might sound, toilet bowl cleaner is the best product for this (something like this is fine). It’s a lot cheaper than using an acid bath or any other specific treatment as some pontooners do and gives you exactly the same results. Honestly.
It’s simple too. All you do is get a bucket and mix up 1 part toilet bowl cleaner with 2 parts water, then use a cheap one gallon sprayer to apply the cleaning mix to your tubes.
By using a sprayer, you will save a lot of hassle, giving you more time to focus on the later steps where we polish the aluminum pontoon logs.
To do it properly, spray one section at a time with just one coat. The key here is to leave it on for a few minutes, but not to let it dry. If it does dry on, you will have to clean it again. By spraying the tubes with cleaner in smaller sections – perhaps 3 foot a time – you will get the best results.
Once you have left the cleaner on for a few minutes in one section, spray that off with clean water before it goes dry. I always use a wet cloth after spraying the cleaner off with water to give it a quick rub down just to make sure.
Step 3: Buffing & Polishing the Pontoons
This is where the hard work really begins.
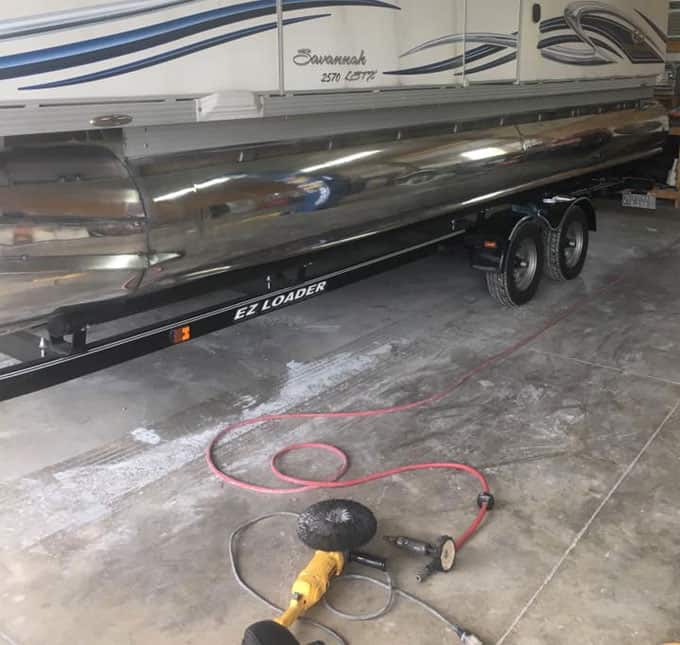
It’s hard work, but you can get great results (image shared on Facebook, credit unknown).
You don’t have to do a pontoon polish. If you just wanted to clean them, you can skip over and move to the next step with the Shark Hide sealer… but given that you are here because you want to know how to polish a pontoon boat, stick with it.
By doing this tube and log polishing step, your aluminum pontoons are going to have a stunning mirror-like finish, making them look brand new.
So, what do you need?

![]() Firstly, you’re going to need a polisher. The one that I use is by a company called Porter-Cable, and you can buy this polisher on Amazon.
Firstly, you’re going to need a polisher. The one that I use is by a company called Porter-Cable, and you can buy this polisher on Amazon.
I prefer the Porter-Cable product to the big names on the market such as Dewalt and Makita, but only due to bad experiences I have had with those products in the past. I have found that if you press to hard with them, you can leave marks on the aluminum logs.
The Porter-Cable polisher just seems a little bit more gentle, so for me, it’s the ideal tool for achieving the best pontoon polish, especially when you use a wool pad with it.
Polishing the aluminum pontoon tubes is simple enough. You just go in circular movements in small areas. Don’t go up and down, as this can leave polish lines that a very keen eye might pick up on. Go in circular motions all the time; that will give you the best results with little S-shaped movements to blend in any lines.
How long will this take?
Good question, and my best answer would be my own experience from polishing a 22-foot pontoon boat; just over 2 hours.
Whilst those aluminum logs don’t look like much, they have a surprisingly large surface area, especially if you are a stickler for detail like me and even like to polish the parts that nobody would ever conceivably see.
Step 4: Apply Cleaner Again
I know what you are thinking. You’re thinking, really? Do I really have to do step 2 again?
Yes, and there’s a good reason for doing so.
If you leave any of the pontoon polish on the toons it can seal on and not look good. You’ve gone to so much trouble already to prepare, clean, buff, and polish so please don’t then un-do all your work by leaving polish residue on the aluminum tubes.
Be really comprehensive, and make that nothing is left on, and you’ve really rinsed the logs down as well as you can – once you’ve done that we can move onto the final step where we can apply the Shark Hide sealant.
Step 5: Apply Shark Hide Sealant & Protectant
I am sure you’ve heard of Shark Hide (view on Amazon) as it’s extremely popular in the pontoon community. There’s a reason why, it’s just really, really, good at what it does.
What is Shark Hide?

![]() It’s a metal protectant and sealant that boat owners swear by for protecting aluminum logs and tubes. I use it, everyone I know uses it, and when you search pontoon forums, everyone on the Internet uses it too. Don’t be the only one who doesn’t.
It’s a metal protectant and sealant that boat owners swear by for protecting aluminum logs and tubes. I use it, everyone I know uses it, and when you search pontoon forums, everyone on the Internet uses it too. Don’t be the only one who doesn’t.
It won’t stop algae and other debris from growing on your pontoons, but what it will do is protect your logs from stains, oxidation, rust, weathering, salt spray, and pitting. It will also help your pontoon polish in staying shiny and mirror-like for far longer.
I would advise that you read the instructions that come with the Shark Hide sealant before using it. I personally mix 1 part Shark Hide to 3 parts water.
Once that’s all done, you’re finished.
Pontoon Boat Polish Tips: Conclusion
Admittedly it’s quite a labor-intensive task to do the best pontoon polish job possible, but I do promise you that the results will 100% be worth your time.
If the job is done properly will take around 3 hours, and just a little bit of expenditure on the cleaning and polishing materials, plus a few tools as highlighted in this how-to guide.
Header image copyright Ben Thompson on YouTube