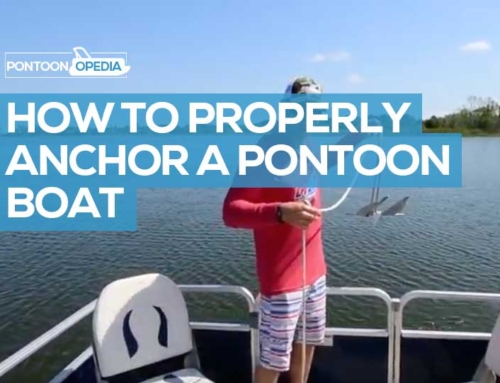
(Image credit unknown, found shared on Facebook.)
This week I received a question about the installation of a fish finder, and how best to fit them to a pontoon boat. No doubt you will have a number of questions too.
For example, where the fish finder should go, how to mount it, whether the transducer should be parallel to the water and more.
Personally, it is something that I have done already three times, on three different toons. Once on my own boat, and then as a favor to my fishing buddies. I think that gives me some good exposure to the pitfalls and challenges that you will also face when installing a fish finder on a pontoon boat.
This guide is going to show you how to do it, with 5 simple steps to follow, plus any additional things you will need to consider. It should take you no longer than one and a half hours to complete the installation project.
Handy Hint: You will need a transducer to get your fish finder working properly. Check the package that you bought to make sure that you have one!
Step 1: Choose Where to Mount the Transducer
You will need a transducer for your fish finder to work properly. Check the package that you bought to make sure you have one. If not, go buy one that’s compatible with your fish finder.
A transducer is the piece of kit that sends and receives the echo data that appears on the fish finder screen, using sonar technology. The transducer will send out sonar waves in a cone pattern below your pontoon boat.
The classic place to install the transducer will be on the bottom bracket to rear of one your pontoon tubes. Most pontoons have a bracket on the back of one of the toons. That is where most people mount them. You can see what the bracket could look like on your pontoon in the image below.
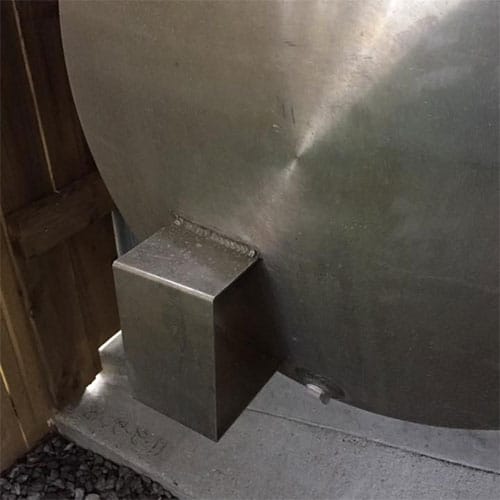
This is what a typical transducer mount could look like. (Image credit unknown, found shared on Facebook.)
Should the transducer run parallel to the water?
Your fish finder should not be parallel to the actual toon because the toons typically sit lower in the back. What you will need to do is adjust it so that it’s parallel to water when sitting in water.
If it’s too low, it will get the full force of the water under the toon. if it’s too high you can get interference from the toon feedback.
Make sure the ‘torpedo’ is just below the bottom of the tube to get clean water or you will lose bottom reading once on plane. You will only get a reading if pretty much sitting still.
On my own pontoon, the transducer is about half inch below bottom of the toon. It’s worked perfectly for me in that position once installed.
The best place to install the fish finder’s transducer is usually on the starboard (right) side of the pontoon boat. This is because you want to make sure that you have enough cord length to run from the transducer to the fish finder monitor on your console, which is typically to the right-hand side of the boat.
By doing so, you will use less electrical cord, and should have ample to connect the console and transducer units together.
If you don’t have enough cabling, then you might have to purchase extensions. In my experience, many fish finders don’t tend to come with enough cabling to accommodate for the pontoon boat lengths that most people have.
Another benefit to fitting the transducer to the same side as the cockpit is that you won’t be running cabling as far. That could cut down on electrical interference and won’t run into problems where signal strength degrades depending on far it has to travel.
Classic examples where electrical interference can occur will be clashes with other items on the pontoon boat such as live well pumps, stereo equipment, and refrigeration units – so keep away from those if you can.
Step 2: Choose Where to Position the Fish Finder Monitor
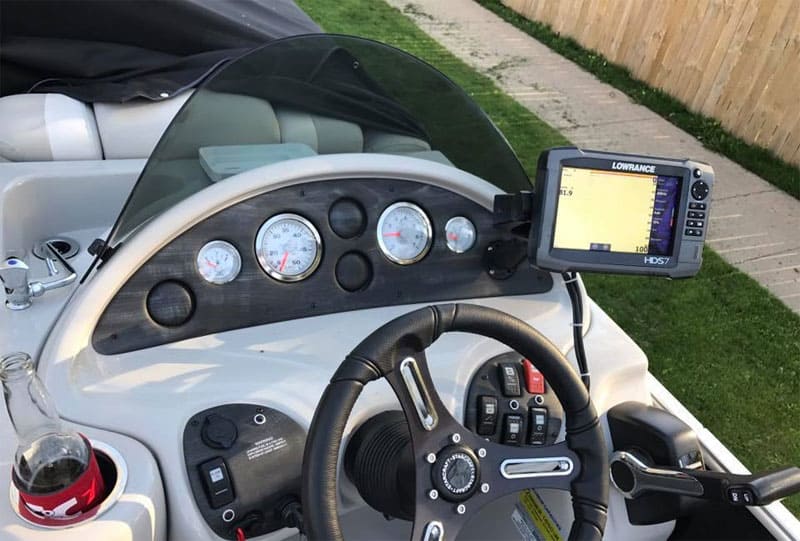
The most common place to mount the actual fish finder monitor is on top of your cockpit console, above the instruments. It’s where I have installed it on all 3 fittings I have completed.
But, it will depend on the console in your pontoon. Most boats will have the space to fit one, sometimes to the side of the actual instrumentation.
Here are some example placements I have seen in various pontoon boats over the last couple of years.
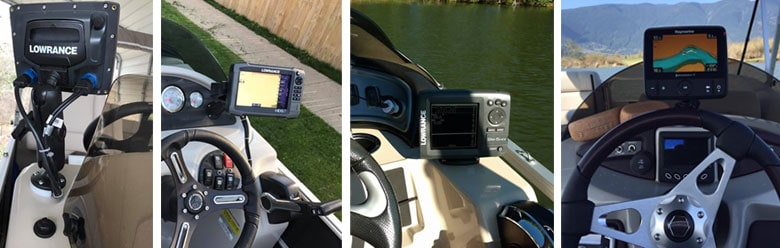
Some examples of how you could mount and install your fish finder. (Image credit unknown, found shared on Facebook.)
When you have chosen where you are going to mount and install the fish finder you will need to check that you have space to run the wires and cabling. Take a look up under the console to check for anything that could get in the way, paying particular attention to the underside of where you are going to be mounting.
You will also find where the boat manufacturer has run cabling already through your pontoon. You’re going to be using the same space and access to run the cord from the fish finder to the transducer – providing it’s long enough of course as described in step one.
Step 3: Mount & Install the Transducer
This will be the easiest part of the installation process.
![]()
Next you can position the transducer mount through the two holes and fix into place using nuts and bolts – make sure that they stainless steel though!
Use electrical conduit to protect the transducer cord, then pull it up through the side of the boat all the way up to your cockpit. You should have a cable gully or similar which the boat manufacturer is already using for existing cabling.
Step 4: Mount & Install the Fish Finder Monitor
This is the part where people will often lose their mind and get confused, as it’s requires drilling through the fibreglass console, which puts people well outside their comfort levels. And understandably so!
Position the monitor bracket exactly where you want it to be, now mark the spots to drill using a pencil. You can then drill straight through.
It’s a good idea here to use rubber washers between the console’s fiberglass and mount. This will significantly reduce rattle and will also prevent the bracket marking your console.
Next slip the bolts up through the holes and tighten up – don’t forget the washers!
Finally, you should drill another hole behind the fish finder bracket. This is where the transducer cord and power cable is going to pull through to connect everything up together.
Step 5: Hook into the Power
You have two options here. You can either use the fuse box or go straight to the battery. Connecting into the fuse box will be easier, as you simply use power connector plugs and tie them in and connect.
Many boats will have some empty plugs in the fuse box, so if that’s you, you have lucked out, and should be able to install the fish finder on your pontoon boat a lot quicker.
If not, you will have hook into the battery using electrical cable. I am no electrician, and have never had to use this method. My advice would be to get someone qualified to do this one, as playing around with electrics on a boat can be very dangerous.
And that should be it.
Test that the fish finder is powering up, take your pontoon boat onto the water, and get fishing.
Frequently Asked Questions (FAQs)
Since writing this how to guide, I have had a number of different and additional questions fired at me from people wanting to know how to install a fish finder on a pontoon boat. I am going to answer those FAQs below.
“Should the base be mounted with screws or bolts and nuts in the fibreglass console?”
It really depends on how thin your console is.
Above all, you should always follow the directions and mounting instructions provided with your fish finder unit. Generally speaking though, depending on the thickness of your console, stainless steel screws should be fine
If the material is thin, then I would use stainless steel bolts with a backer plate. That will really well and give the stability that you need.
“After installing my fish finder, I found at full speed it loses depth.”
Some fish finder and transducer units just do not have the capability to keep up at full speed, so you may not get accurate readings. It’s just something that comes with the territory and is a negative of the cheaper units on the market.
If it’s a cheaper one, say less than $150 I have seen that at speeds above 20mph they can lose performance.
In most cases though, your fish finder should not have a problem keeping up. Try adjusting the sending unit and check to make sure there is no cavitation around the unit.
“If running under the boat, should I use flexloom to protect the cords?”
I don’t recommend running cabling under the deck, but instead on the actual boat. Having said, I would definitely use flexloom anywhere that the cords and cables are running. It will give you extra protection so is well worth the extra time and effort.
“When I start my motor, the fish finder turns off.”
If your pontoon fish finder is turning off when you start your motor up, it could point to a few different issues. Most of the time you will need to unplug the power to fish finder and plug it back it for it to turn back on – which isn’t an ideal situation.
The problems could be a voltage sag due to the draw of power when cranking. You could try adding a battery that is dedicated to electronics. Then the other battery will be for engine starting only.
A weak battery or having too small a battery are typical fish finder problems on a pontoon boat. By putting it onto a different power source and wiring it separately on the fuse panel you will probably see different results.
Next time you have your pontoon out on the water, take a meter and check the voltage output at the battery to see if you are charging it while engine is running. It should be at least 13 volts.
I usually charge the day before I go fishing (unless of course I forget), and also keep a trickle charger my pontoon when stored off the lake at the boat storage place.
“Will a single boat battery will carry the fish finder along with the stereo, leaving enough juice to start it?”
My advice, as with before, is to add a second battery which you then use that to run your accessories. Then you will never have to worry about being able to start your pontoon boat with the primary battery.
Believe me, you’ll be so happy that you don’t constantly have to check the single battery each time!
You can then probably run the stereo and fish finder for hours on the secondary battery. But the point is, that if the battery does die, all you have to do is start the engine with the other battery and then you’re charging your second one again.
“I have a Lowrance x96 fish finder and when I push the power button it beeps, but shows nothing on the screen.”
As obvious as this sounds, check to see if the brightness is turned all the way down. On my Lowrance fish finder, after you power it up if you push the power button again the screen brightness comes up.
You use your left and right arrows to adjust. The right arrow to brightens the screen and monitor display.
“My Humminbird Helix 5 fish finder has side imaging. My problem is if I mount it on the right pontoon bottom, the engine will block the left side. Do you have a solution to this?”
It’s hard to explain, but the engine will not block it. It’s all do to with the angle of the dangle. Basically the cone or signal will not be large enough at that depth for the engine to interfere with it at all, so don’t worry.
My buddy has that exact fish finder and his is mounted on the left toon and works great. He did have to get an extension for the transducer though.
“I’m having a Raymarine Dragonfly 4Pro installed. Do I have to install the transducer if I don’t plan on using the fish finder portion? I just want the mapping portion. The only reason I think I may need it is for depth gauge, but don’t charts have this information?”
For me, I would ask why you would spend the money if you are not going to us the features of the fish finder unit. I check the depth finder and fish finder on mine quite often and I think you will use it more than you think.
Charts will not have the close and in-depth details the depth sounder will give, the sounder (transducer) will likely give you water temperature too. While you might not want to use your fish finder for fishing it’s nice to see water depth, water temp, and speed whilst out on your pontoon.
To summarize, water depth is important, but if you only want maps, put Navionics on an old tablet or your smartphone instead of spending this type of money.
“I have a 2008 Crest 20-footer, but both the pre-installed fish finder and the fuel gauge don’t work. Would they both be on the same circuit?”
They certainly could be, but it all depends on how it has been wired. Usually all gauges are on the same 12-volt source line. If they are tied into the same circuit then this could be a problem. If I wire or re-wire any accessories I try to use separate circuits from the battery switch unless I have open circuits in the fuse block.
So, check all the connections first. My fuel gauge quit a few months ago and I initially started to look at replacing the unit on the tank. But, I decided to look at wires first and found disconnected wire underneath console – go check yours before doing anything too drastic!
“My new pontoon came with a Hook 3 fish finder pre-installed and a depth sonar. I lose accurate readings at speed. The dealer says to adjust the height of transducer, but I should I take it up or down?”
Firstly, make sure the unit has the latest updates. Many dealers don’t update their units that are previously mounted or sitting on a shelf waiting to be sold. Next, adjust the transducer position.
Generally, you’d move it down. However, it is possible that it’s already set too low and the turbulence around the transducer is causing issues.
Also, if you go too far down it’s possible to create a rooster tail spray. You want the transducer with approximately the bottom one quarter an inch in the water when on plane.
I’m not familiar with the Hook 3, but on the 7s you can go into your settings and play with them. For example, depending on where and how your using it change from general use to fresh water shallow trolling.
“I want to install a fish finder on my pontoon boat, but my eyesight is bad. Is there one that you recommend that’s easy and clear to use?”
Try to find something with at least a 5-inch monitor with color. Humminbird, Lowrance and Garmin are all very good.
All newer units let you fine tune the display to show and display large numbers . If you have the room, you can flush mount to the dash like I a friend of mine did on this pontoon.
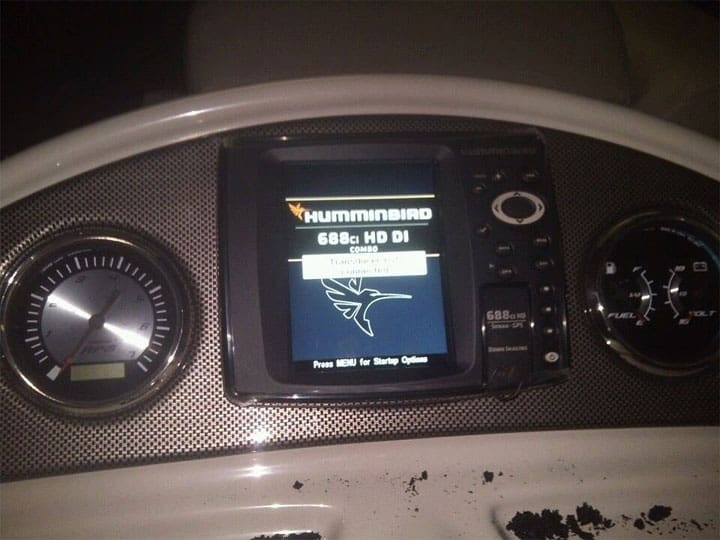
An example of a fish finder being installed and fitted into the actual console. (Image credit unknown, found shared on Facebook.)
The above photo shows a Humminbird 6 series with built in GPS. It’s an older unit but should still be for sale at good prices.

![]() Another guy I know is in his 80s. He has a Helix7 by Humminbird and even with his poor eyesight is able to see the numbers and charts clearly. You can pick them up on Amazon, and if you click the link you see to the right of this page that will take you straight into the product so you can check the reviews and questions other people have already asked.
Another guy I know is in his 80s. He has a Helix7 by Humminbird and even with his poor eyesight is able to see the numbers and charts clearly. You can pick them up on Amazon, and if you click the link you see to the right of this page that will take you straight into the product so you can check the reviews and questions other people have already asked.
It’s also worth looking for used Lowrance fish finders. Some fishermen upgrade every two years or so, meaning it’s to get a great deal on perfectly good units.
“On my 2015 Sweetwater 2286 Tri Tune I have the skin under the boat. I am having trouble fishing the transducer cable for my fish finder to the helm.”
I’ve seen this problem before when installing fish finders onto a pontoon boat. What you need to do is mount the transducer first then run the cable up and along the port toon.
You can then use an old piece of PVC, tape the cable to it, and you should be able to get it far enough to starboard side to then reach up through floor. This was with a Humminbird, where the cable it came with was not long enough so bought 10 foot extension. We also had to drill another hole in the deck under the console.
“I like to beach my pontoon, but my fish finder is installed to one of the tubes so has been bent and damaged. What should I do as I want to continue beaching?”
It sounds like the beach doesn’t have much of a slope. The only beaching I’ve done is with the front half of the toons (or less) being beached, making sure that there is always water under the back half. The back of my pontoons always have at least a foot of water under them.
You definitely don’t need to ever beach the entire boat.
Also, my depth finder can be rotated up so if yours have that functionality, make sure you do it before beaching.
“I have a 2013 Bennington and have bought a new fish finder. It was easy to replace because you just unplug the old and plug in the new. But now I can’t get it to work and it says it’s in simulation mode.”
This will happen if the transducer isn’t plugged in securely. Just look at the wires going into the unit and make sure everything is plugged in all the way. This happened to me after I was cleaning the boat one day. The transducer wire was a bit loose and I just had to push it back in.
It shouldn’t be that hard to do. Some are tight due to being water proof and some will need to be pushed in then twisted. They are all simple. Just take a look at the plug and play with it.
Handy Hint: Looking for some great fishing rod holders? Here’s the top 5 rod holders for pontoons.